Last updated 20 August 2026
The Melora Handbook
Everything Melora does, in the order you will need it — from setting up your event to downloading the last photograph.
Melora collects the photographs your guests take. They scan a code on the table, their camera roll opens, and what they choose lands in one shared gallery. Nobody installs an app and nobody makes an account.
This page is the whole product, written out. The first half is for you, the host. The second half is what your guests see, so you know what you are asking them to do before you ask them.
Create the event
Name, date, category and how you want uploads handled. A few minutes.
Print the card
Melora draws a QR card matched to your occasion. Print it and put it on the tables.
Guests scan
Camera, code, upload. Photos, video and voice notes, with no app.
You keep an eye on it
Watch it fill up from your phone, and approve what appears if you asked to.
Take it home
Download the whole gallery as one archive, at full quality.
For hosts
Setting the event up
Four screens, once, well before the day.
Creating your event
Everything starts on one form. The name is what your guests see across the top of the gallery and on the printed card, so write it the way you would write it on an invitation.
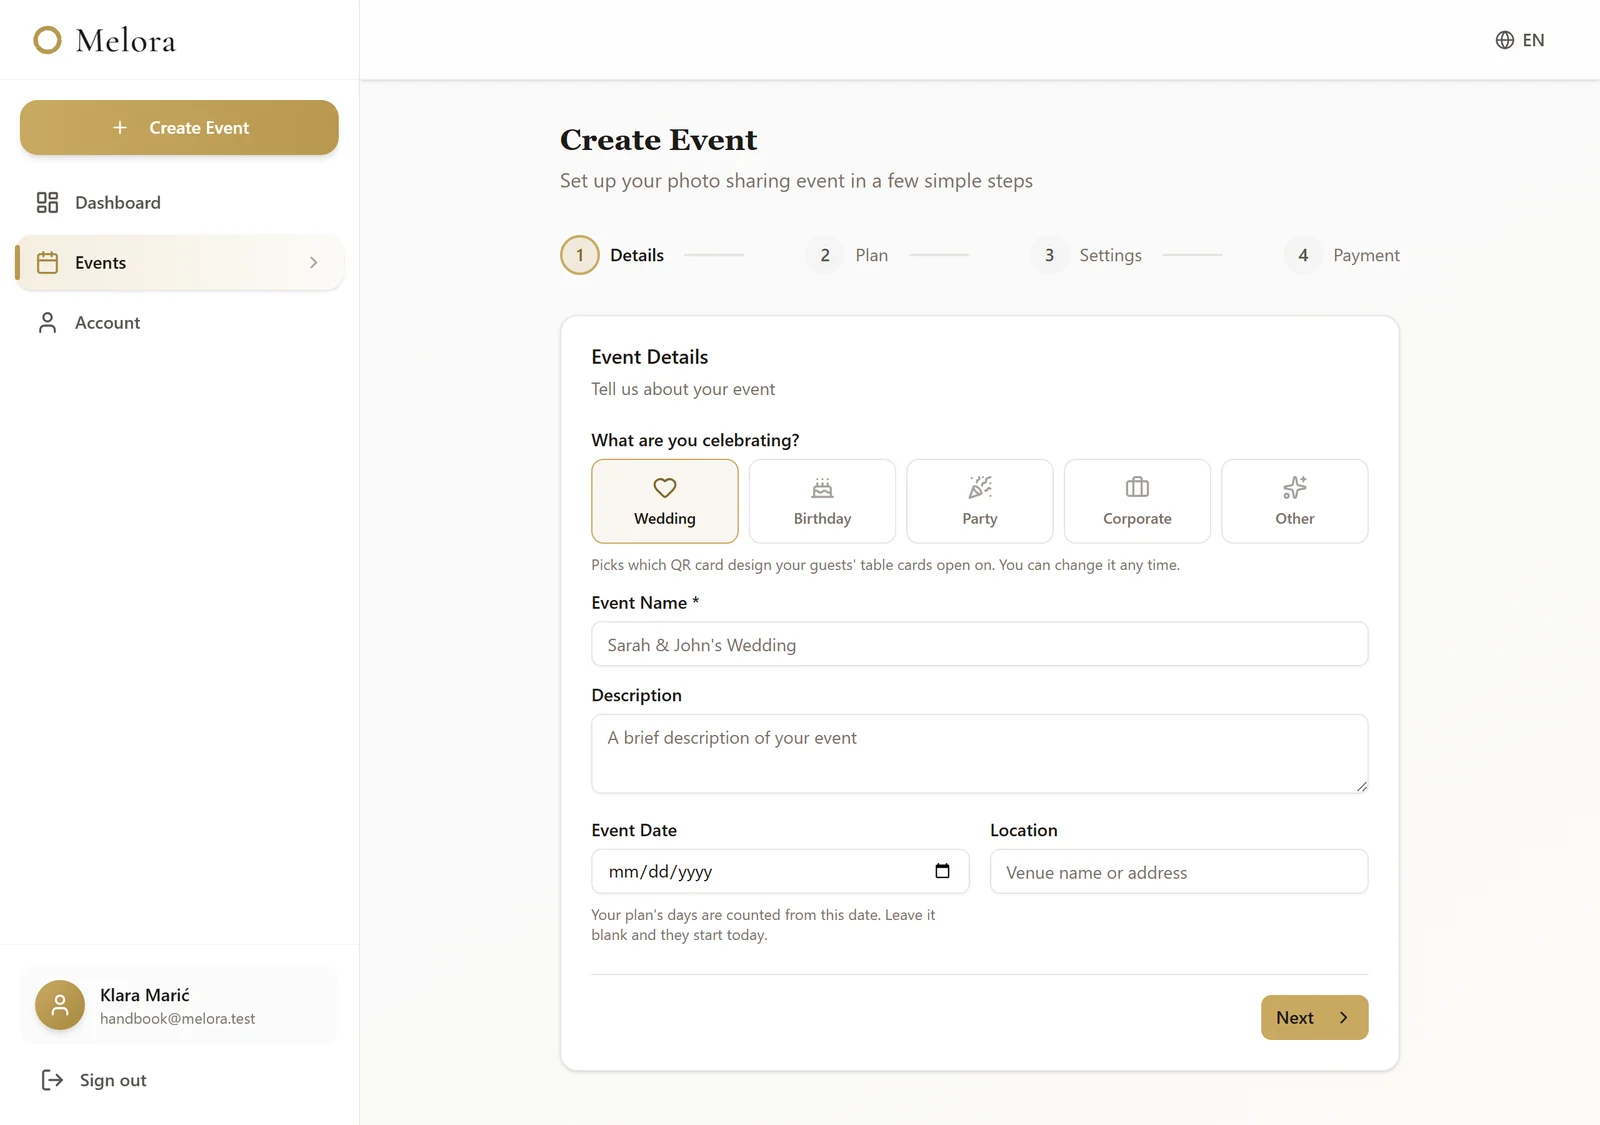
The category is not decoration. It decides which QR card design opens first when you go to share the code, and it is the one field worth getting right now rather than later.
- Wedding — two interlocking rings.
- Birthday — balloons.
- Party — sparkles.
- Corporate — a plain ruled header.
- Other — the original card, with no motif.
The event date is the day being celebrated. It is shown to your guests, and it is what your plan's days are counted from — see “How long your gallery stays open” below.
Choosing a plan
Every paid package includes unlimited photos and videos, a live wall, printable QR cards, full-quality downloads and 90 days for guest uploads. Choose the extra experiences you want, rather than a storage allowance.
| Package | Price | Storage | Guest uploads | Video | Approvals |
|---|---|---|---|---|---|
| Demo | Free | 20 MB | No deadline | No | No |
| Gallery | €50 | Unlimited | 90 days | Yes | Yes |
| The whole story | €100 | Unlimited | 90 days | Yes | Yes |
| Carefree | €200 | Unlimited | 90 days | Yes | Yes |
The whole story adds a moderator during your event, photo and video challenges, and private video messages. Carefree adds a short recap film made by our team. Request it after your event when your memories have arrived. It takes a few days, and we email you and guests who ask to be notified when it is ready. Personal photo finding is still in development, with no guaranteed release date.
Paid packages have no total storage quota. Per-file upload limits still apply, and the host can limit how many files each guest sends. The free demo has a 20 MB total photo allowance.
How guests may upload
The third step decides how open the gallery is. All of it can be changed later, and changing it takes effect immediately — including in the middle of the party.
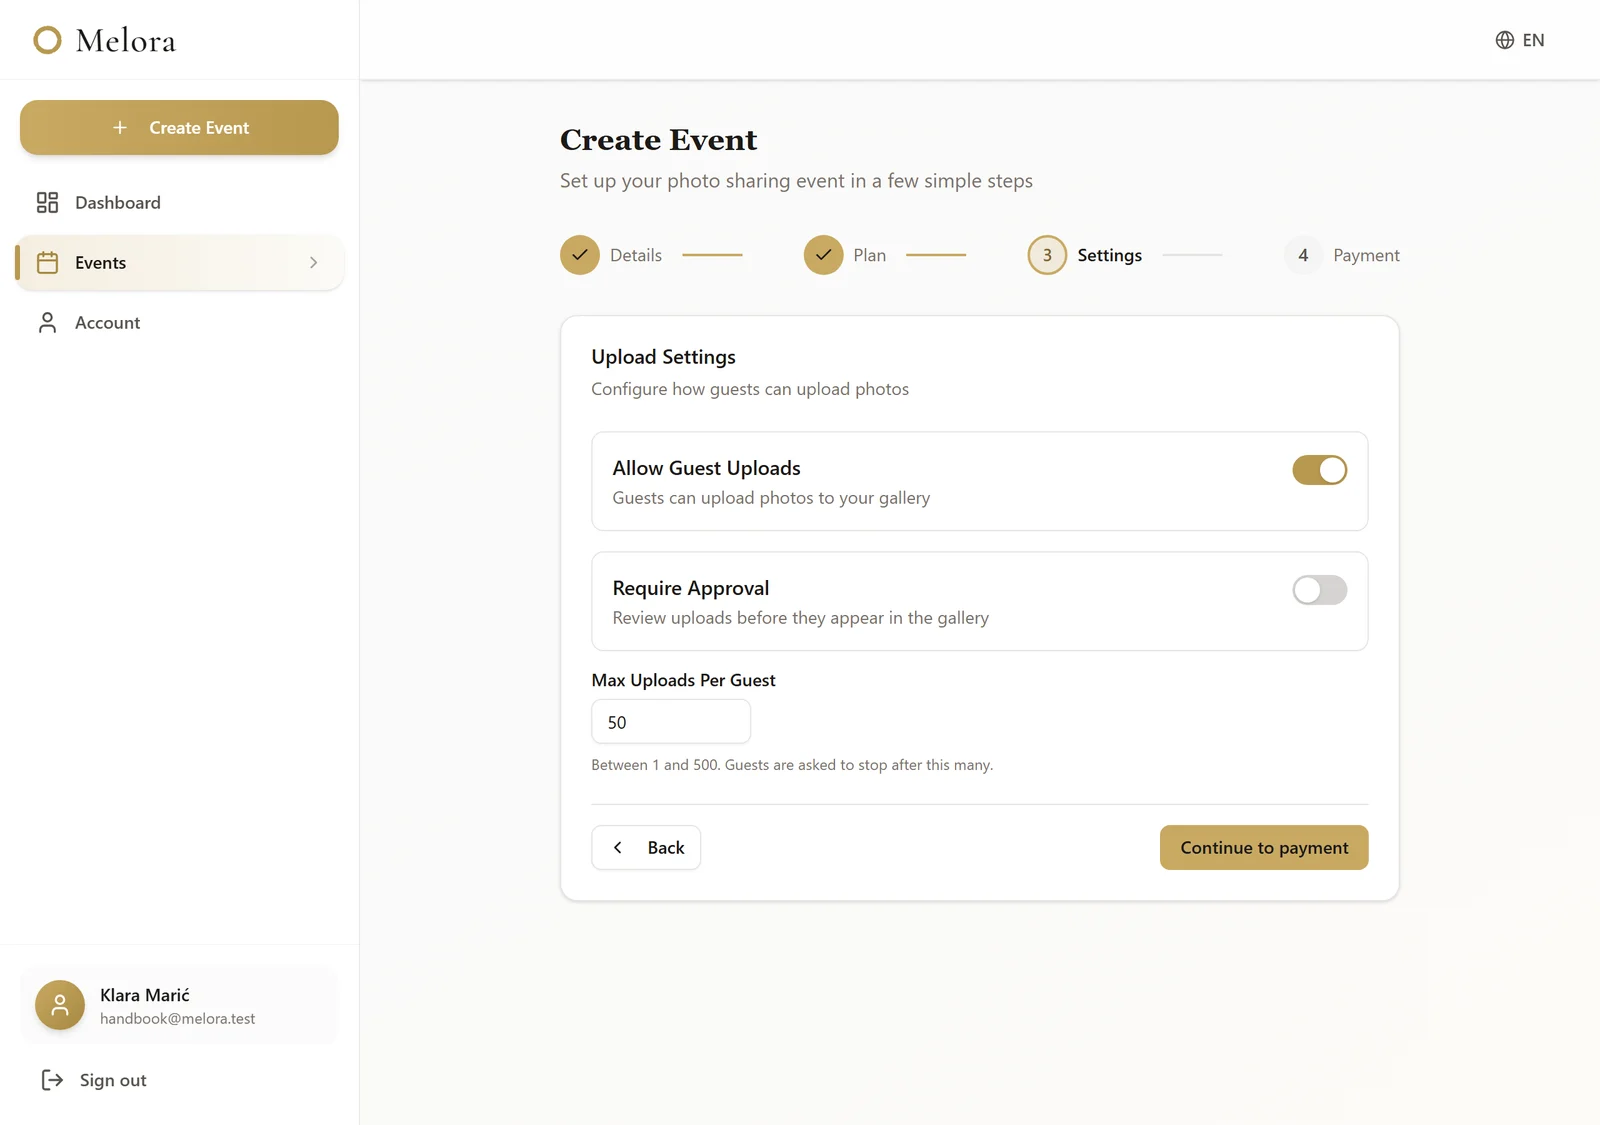
Allow guest uploads
Off turns the gallery into a viewing-only album. Useful the day after, when you would rather nothing else arrived.
Require approval
On means nothing appears until you have seen it. Covered in its own section below, because it changes what your guests experience.
Allow anonymous uploads
On lets a guest skip the name box. Off asks everyone to say who they are before their first upload.
Photos per guest
A gentle ceiling so one enthusiastic guest does not fill the gallery on their own. Treat it as a courtesy limit rather than a lock.
Paying
Payment happens on melora.app. You are not handed off to another site, and card, Apple Pay and Google Pay all work in the same box. The free tier never reaches the payment step at all.
Your event exists before you pay — it is written down first and switched on when the payment clears. If anything goes wrong mid-payment, nothing is lost and nothing is double-charged. As soon as it clears, an email arrives with your event code, the gallery link and a pointer back to the QR card, in whichever language you signed up in.
How long your gallery stays open
A plan's days are counted from the day you are celebrating, not from the day you paid. Booking three months early costs you nothing.
When the window closes the gallery stops accepting new uploads. It does not disappear: you and your guests can still open it, look through it and download from it, in full quality, for as long as it exists.
If you need longer, there are two ways. Every plan includes one free extension of thirty days, which you switch on from your event's settings. Beyond that, moving up a plan gives you that plan's full window counted from the day you move, along with its additional benefits. You pay only the difference between the two. Your event code and every card you have already printed stay exactly as they are.
If your date moves, tell us and we will move the window with it. Changing the date in Settings updates what your guests see, but it does not re-date the gallery window on its own.
For hosts
Your QR code
The one physical object in the whole product.
The card
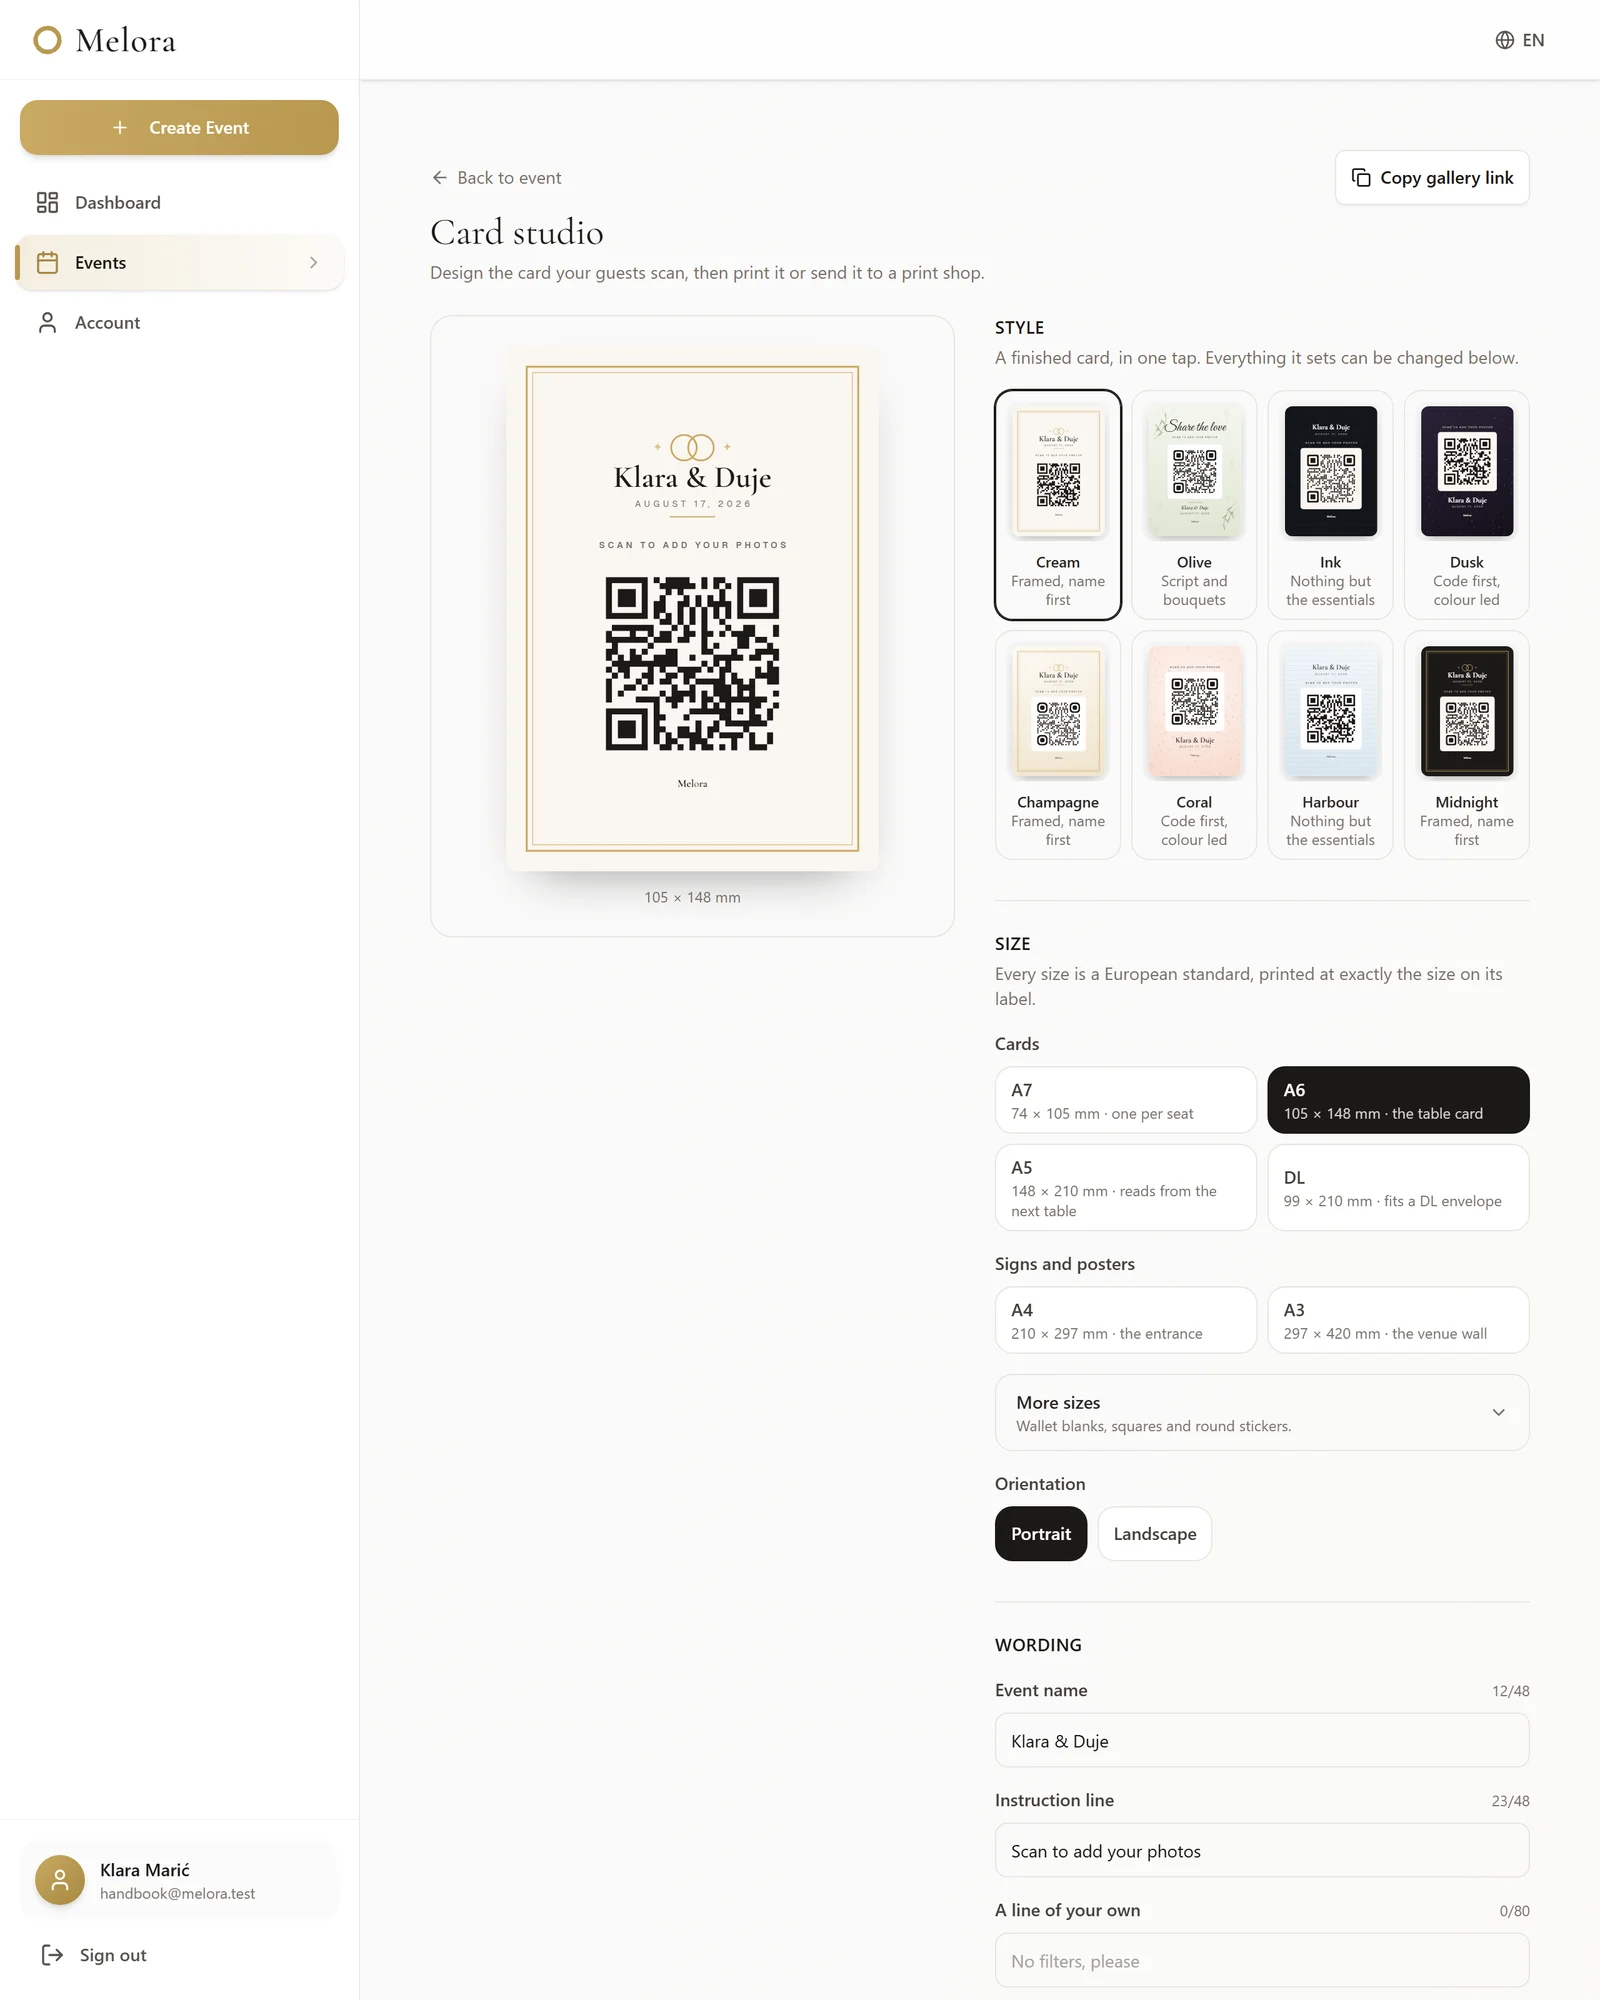
Melora does not just give you a bare QR code. It draws a finished table card — your names, the instruction, the code, the link written out for anyone whose camera will not cooperate, at print resolution.
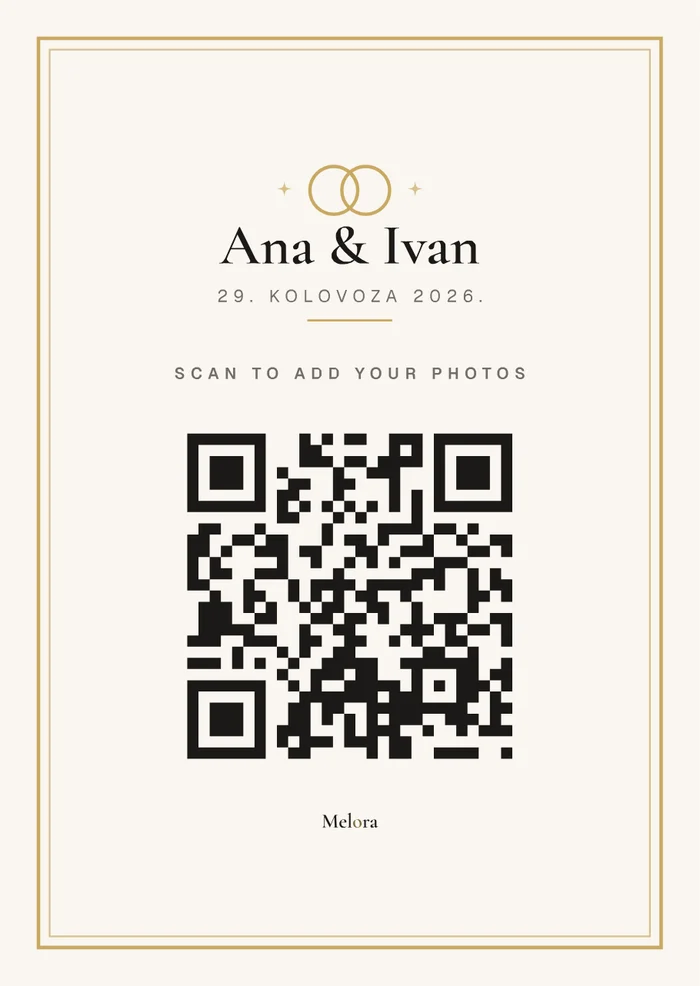
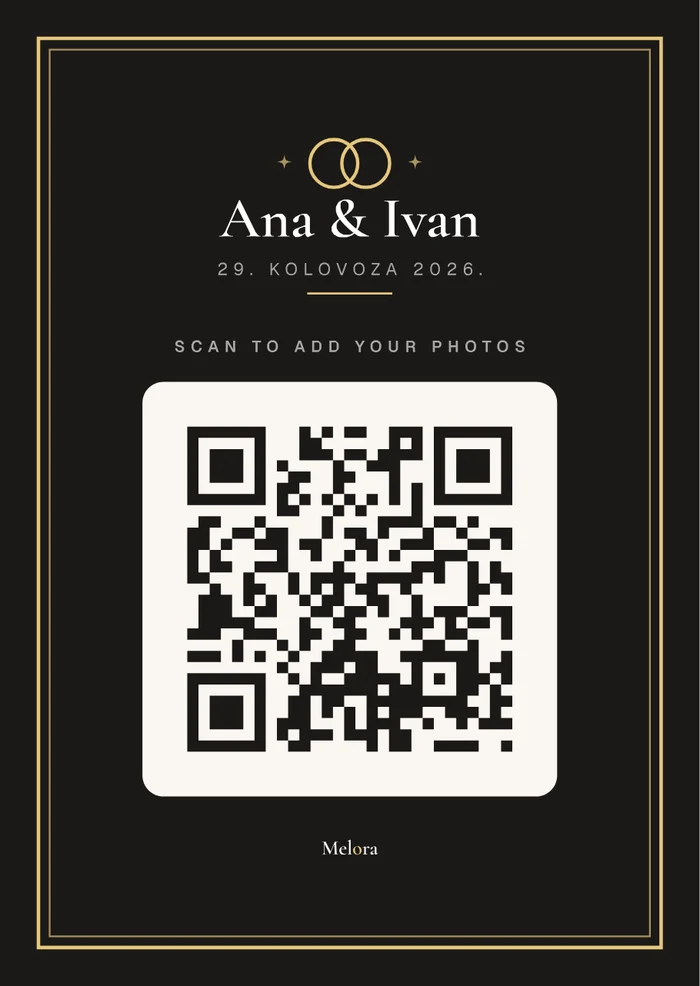
Two styles, and the darker one keeps a pale panel behind the code rather than inverting it. That is deliberate: a scanner needs a hard light-to-dark split far more than a code needs to match your stationery, and the room this will be read in is lit by candles.
For the same reason the code itself is never printed in gold. The colour lives in the frame, the type and the paper.
Designs by occasion
The card design follows the category you picked when you created the event, and you can switch to any of the others at any time.
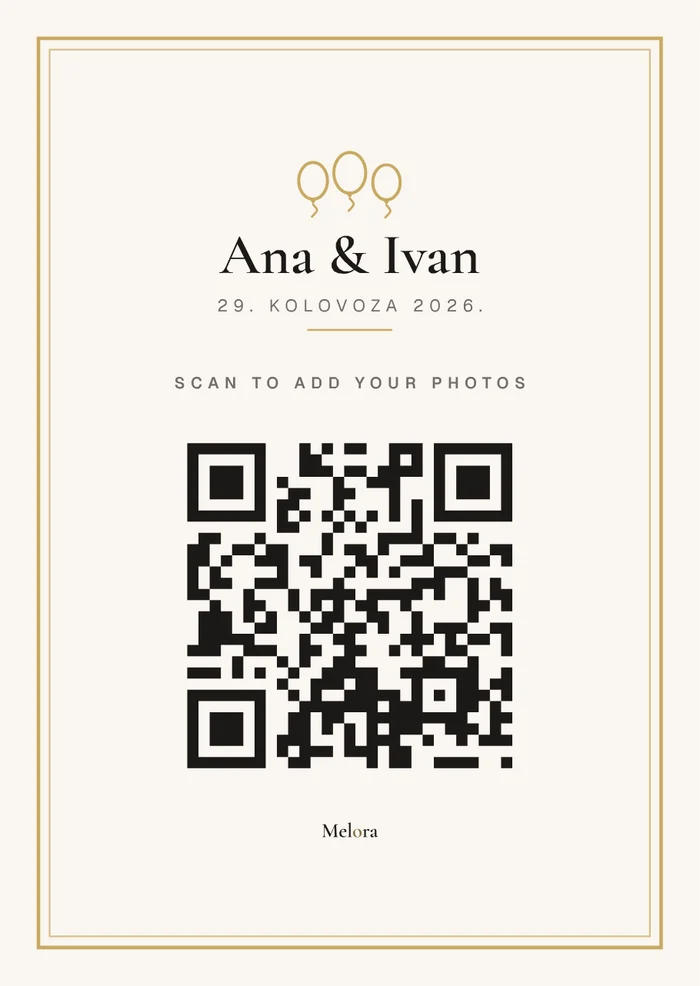
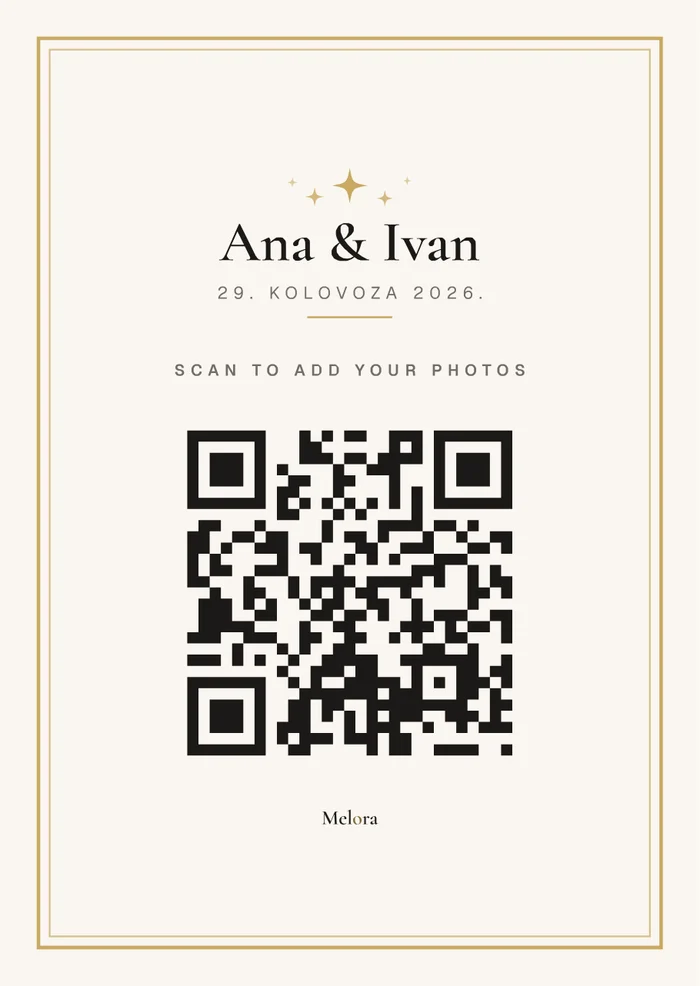
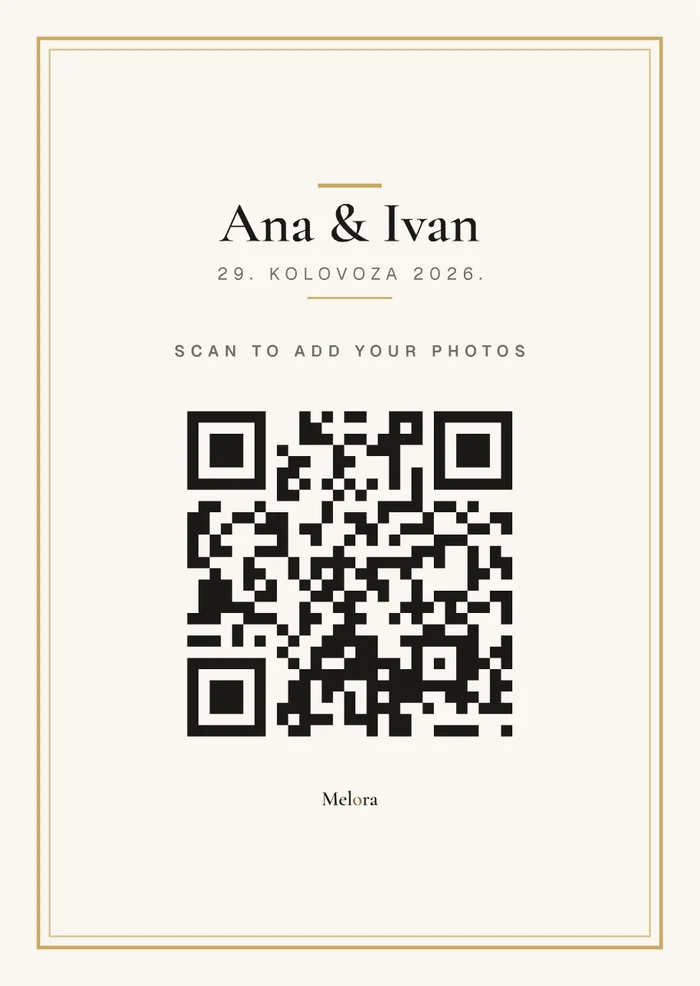
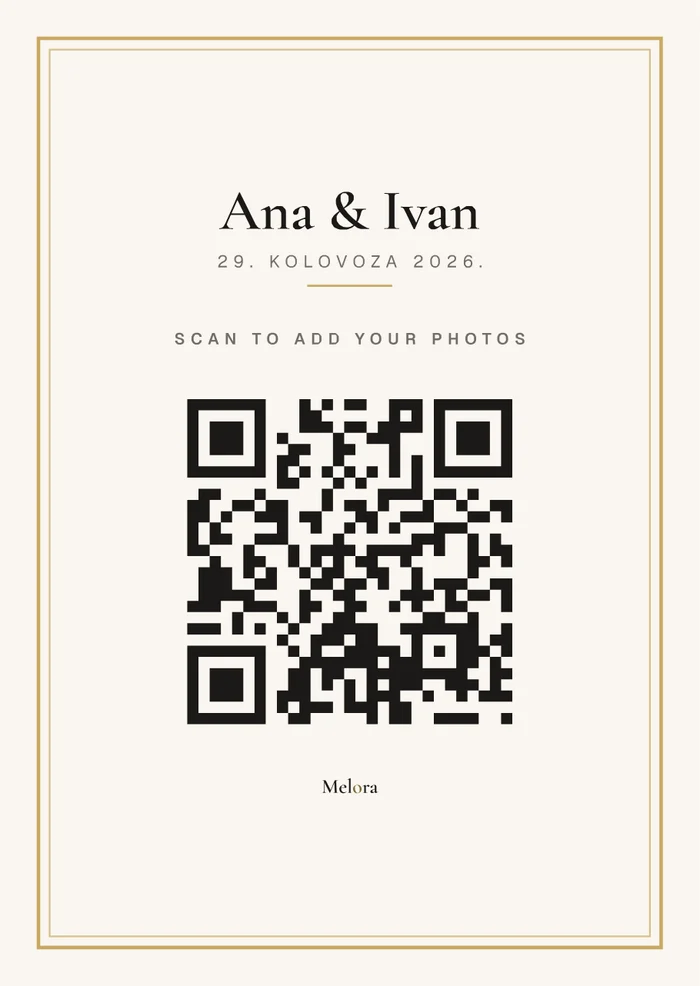
Printing and placing it
The card is drawn at 3.5 × 5 inches at 300 dpi — a standard photo print. Print it that size or larger; shrinking it to fit a place card is the one reliable way to make a code hard to scan in low light.
- One on every table, standing up, not lying flat.
- One near the bar, which is where people stand around with a phone already in hand.
- One by the entrance, so guests get it before their hands are full.
- Add a line of your own: “Scan to add your photos” does more than the code alone.
You can also just send the link. Copy it from the same dialog and put it in the group chat — it works exactly like the code, and it is the answer for anyone who could not make it.
For guests
What your guests do
No app, no account, no password. This is the whole of it.
Scanning and arriving
A guest points their camera at the card and taps the link that appears. The gallery opens in their browser, with your names, your date and your welcome message.
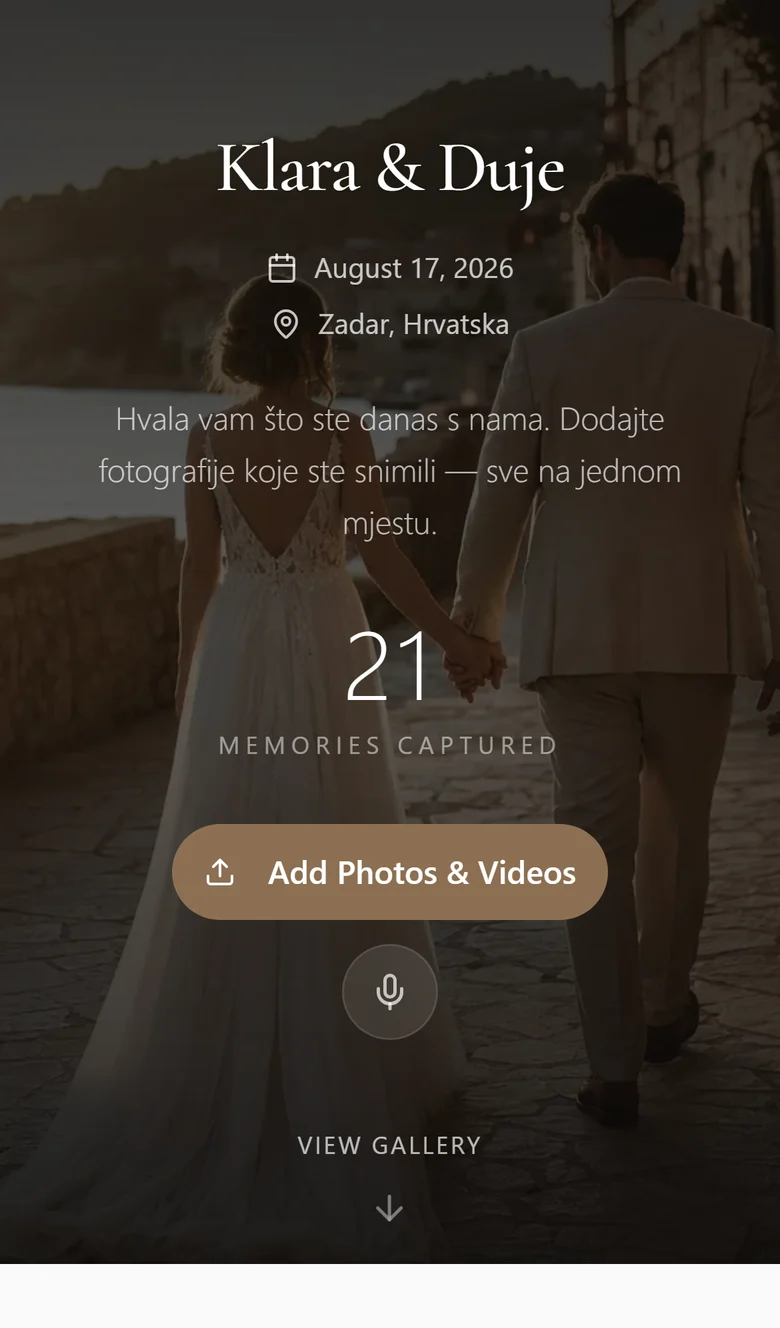
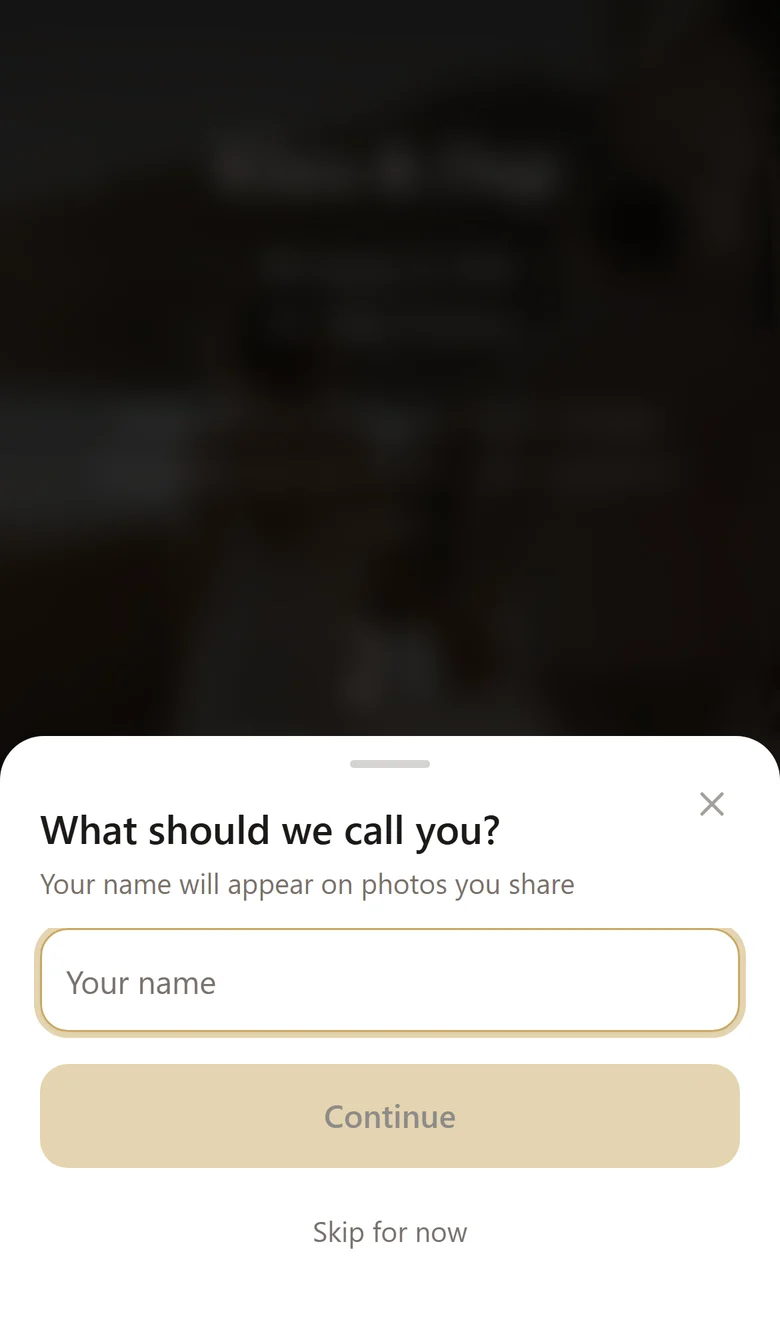
The name is asked for once and remembered on that phone. It is what appears under their photographs in the gallery. If you left anonymous uploads on, they can skip it.
Adding photos and video
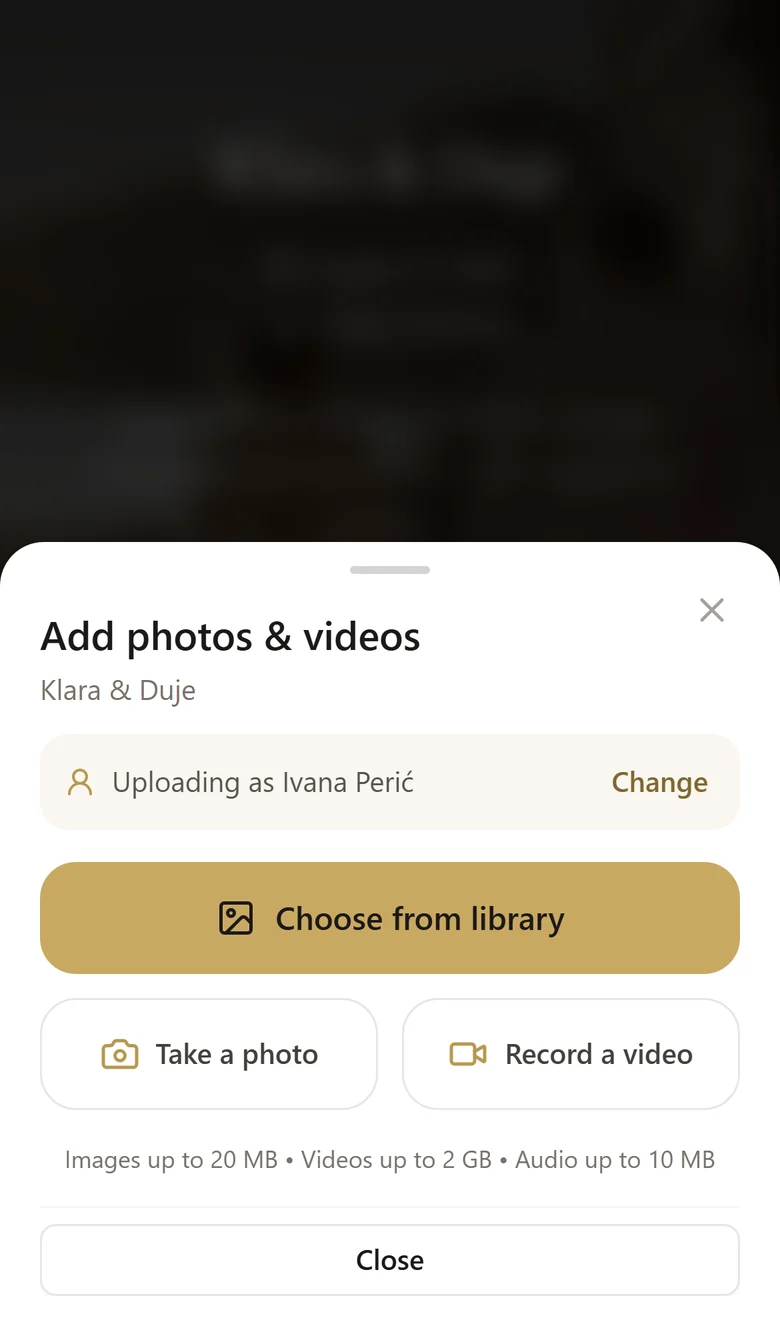
Tapping Add Photos & Videos opens their own camera roll. They pick as many as they like and the upload starts immediately, with real progress rather than a spinner.
| Kind | Largest file | Formats |
|---|---|---|
| Photo | 20 MB | JPEG, PNG, WebP, AVIF |
| Video | 2 GB | MP4, MOV, WebM |
| Voice note | 10 MB | Recorded in the browser |
- The same photograph sent twice is stored once. Guests who forward each other pictures cannot fill your gallery with duplicates.
- Photos are rotated the right way up automatically, and camera details — including where the photograph was taken — are stripped before anything is stored.
- The screen can lock mid-upload without killing it, and if the connection drops the phone remembers what it had not finished.
iPhones shoot in HEIC, which Melora cannot read. In practice this almost never comes up: when a photo is chosen through the normal picker, iOS converts it to JPEG on the way out. If a guest does hit it, they are told the format is the problem rather than being shown a generic failure.
Voice notes
There is a microphone button beside the upload button. It records a short message — the thing a guest would have said in a card, said out loud, at the time.
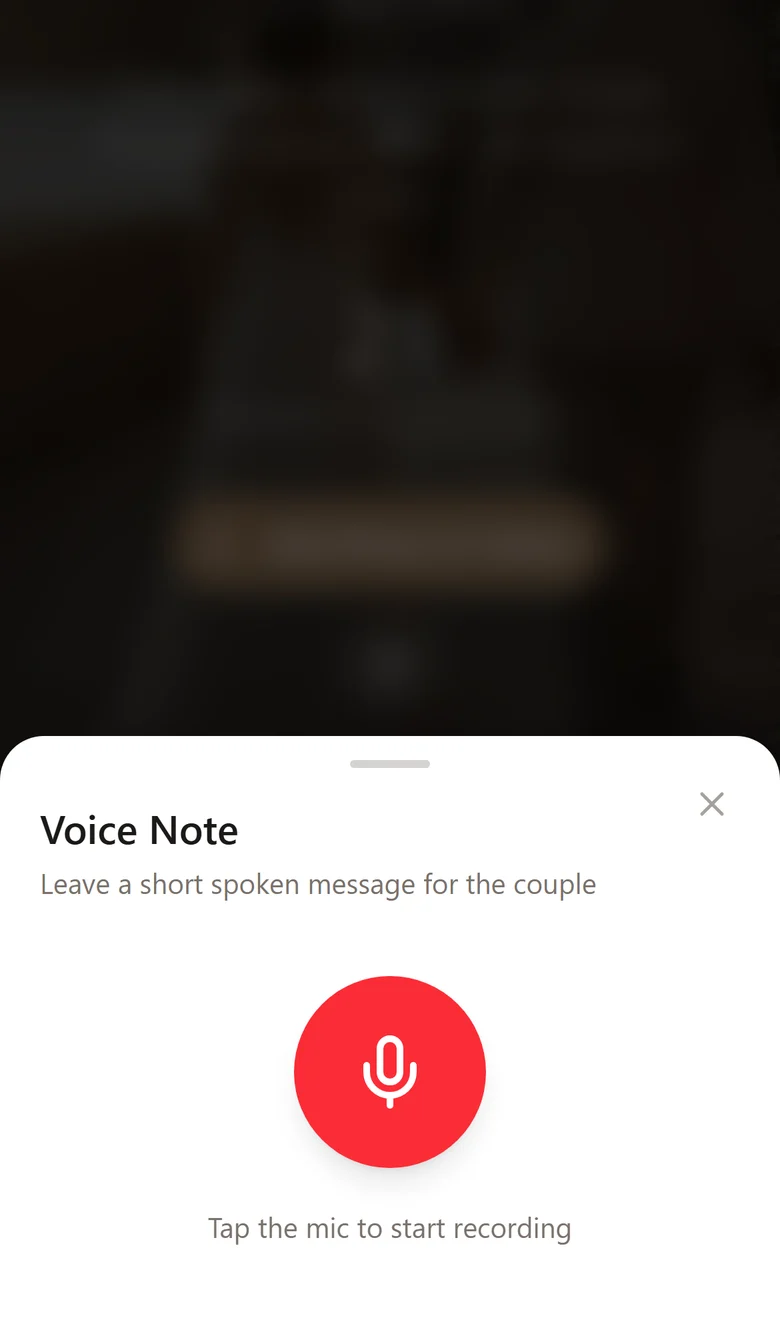
Voice notes are private to you. They never appear in the gallery grid, no other guest can browse them, and they are not included in the archive a guest downloads. They are a message to the couple, not a post.
Challenges and private video messages
The whole story and Carefree include photo and video challenges. In your event's Challenges page, edit the tasks, arrange their order and switch them on. Guests can accept a task or skip it. Their photo or video goes through the same approval rules as an ordinary upload.
With private video messages enabled, guests can choose a voice note or record a video of up to 15 seconds. They can watch it back and retake it before sending. The browser asks for camera and microphone permission; a voice note remains an option if video permission is denied.
Open Messages in your event to play, filter and manage voice and video messages. Private messages never appear in the guest gallery or guest downloads. Approving one does not make it public. Deleted messages can be restored from Trash.
Looking through it
The gallery fills up as the evening goes on, without anybody refreshing anything. Guests can open any photograph full screen, and mark the ones they like — privately, on their own phone.
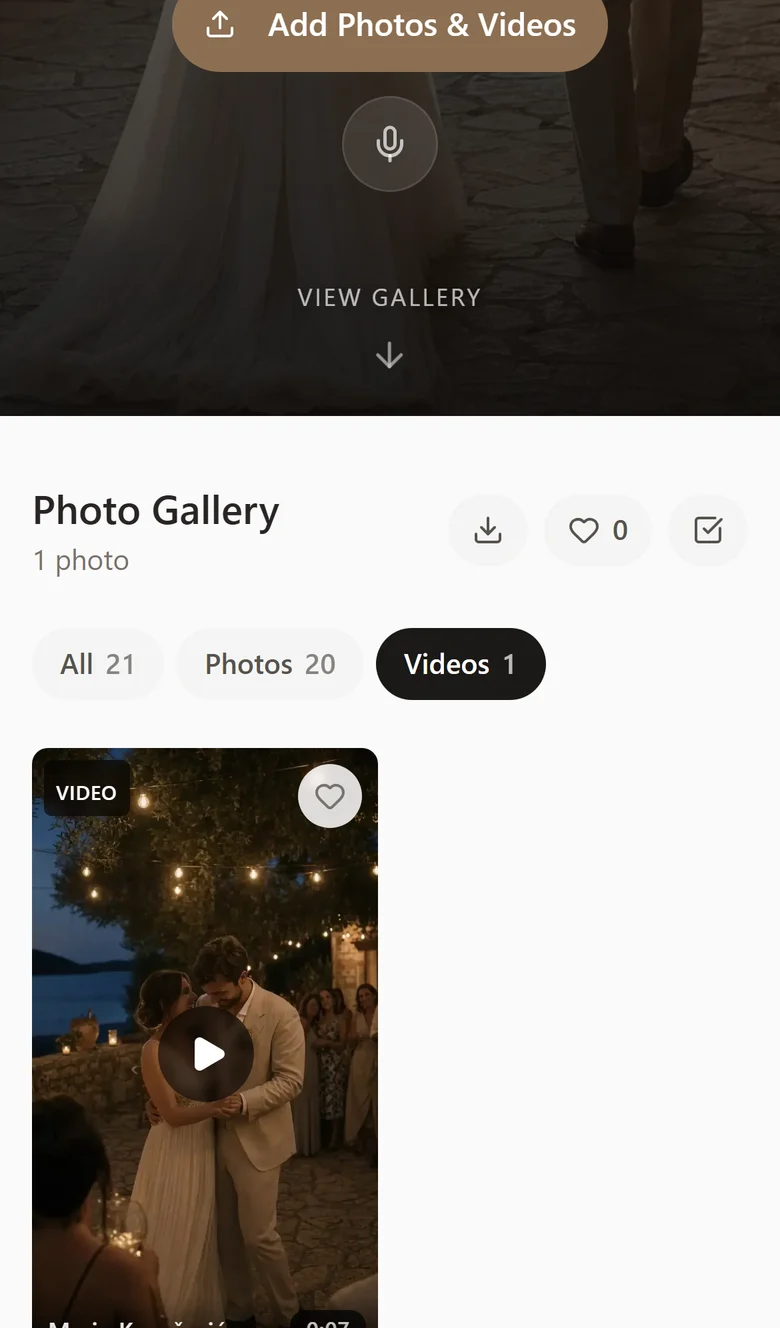
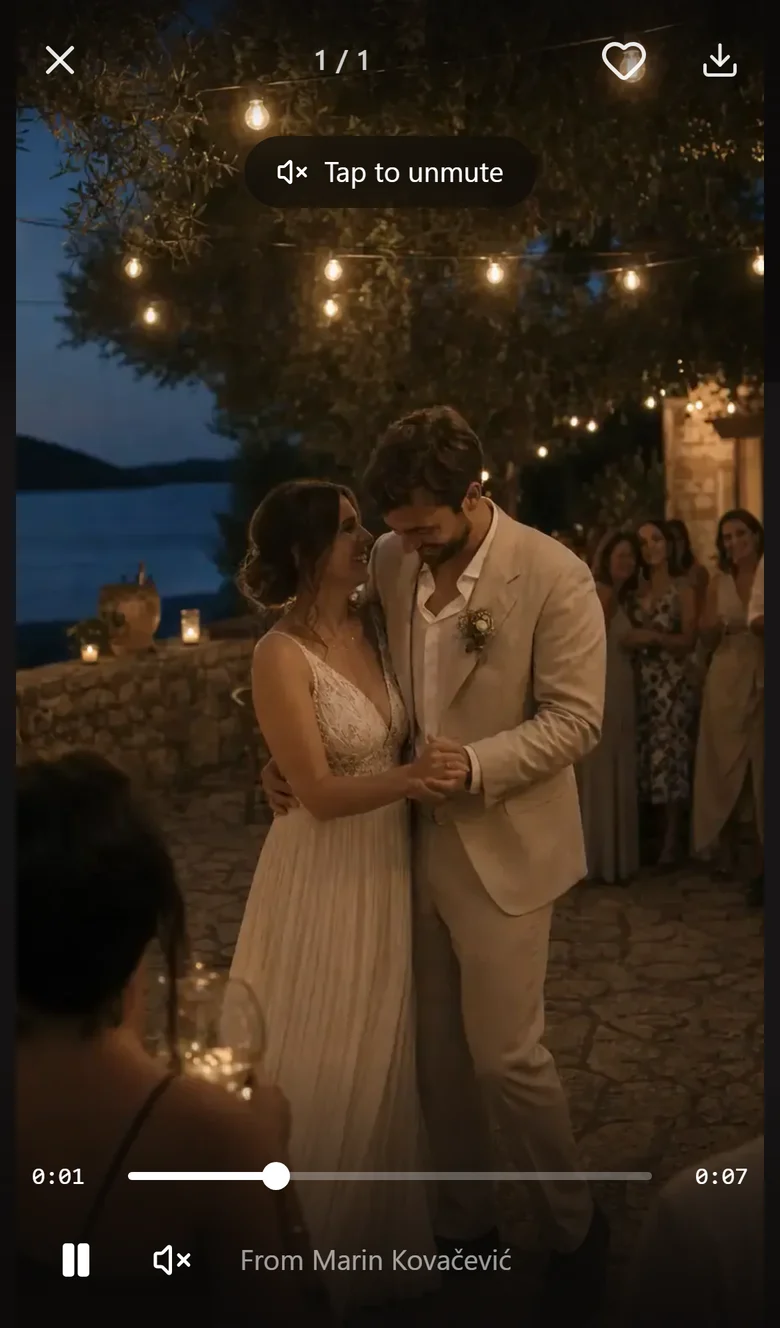
A guest can save a single photograph, and — if you have left it on — download the whole gallery. What they get is the photograph in full quality, not the smaller copy the screen was showing.
For hosts
Keeping an eye on it
From your phone, during the party, without leaving the table.
Your dashboard
Signing in at melora.app gives you every event you have, with how many photographs are in each and how many people have opened the gallery.
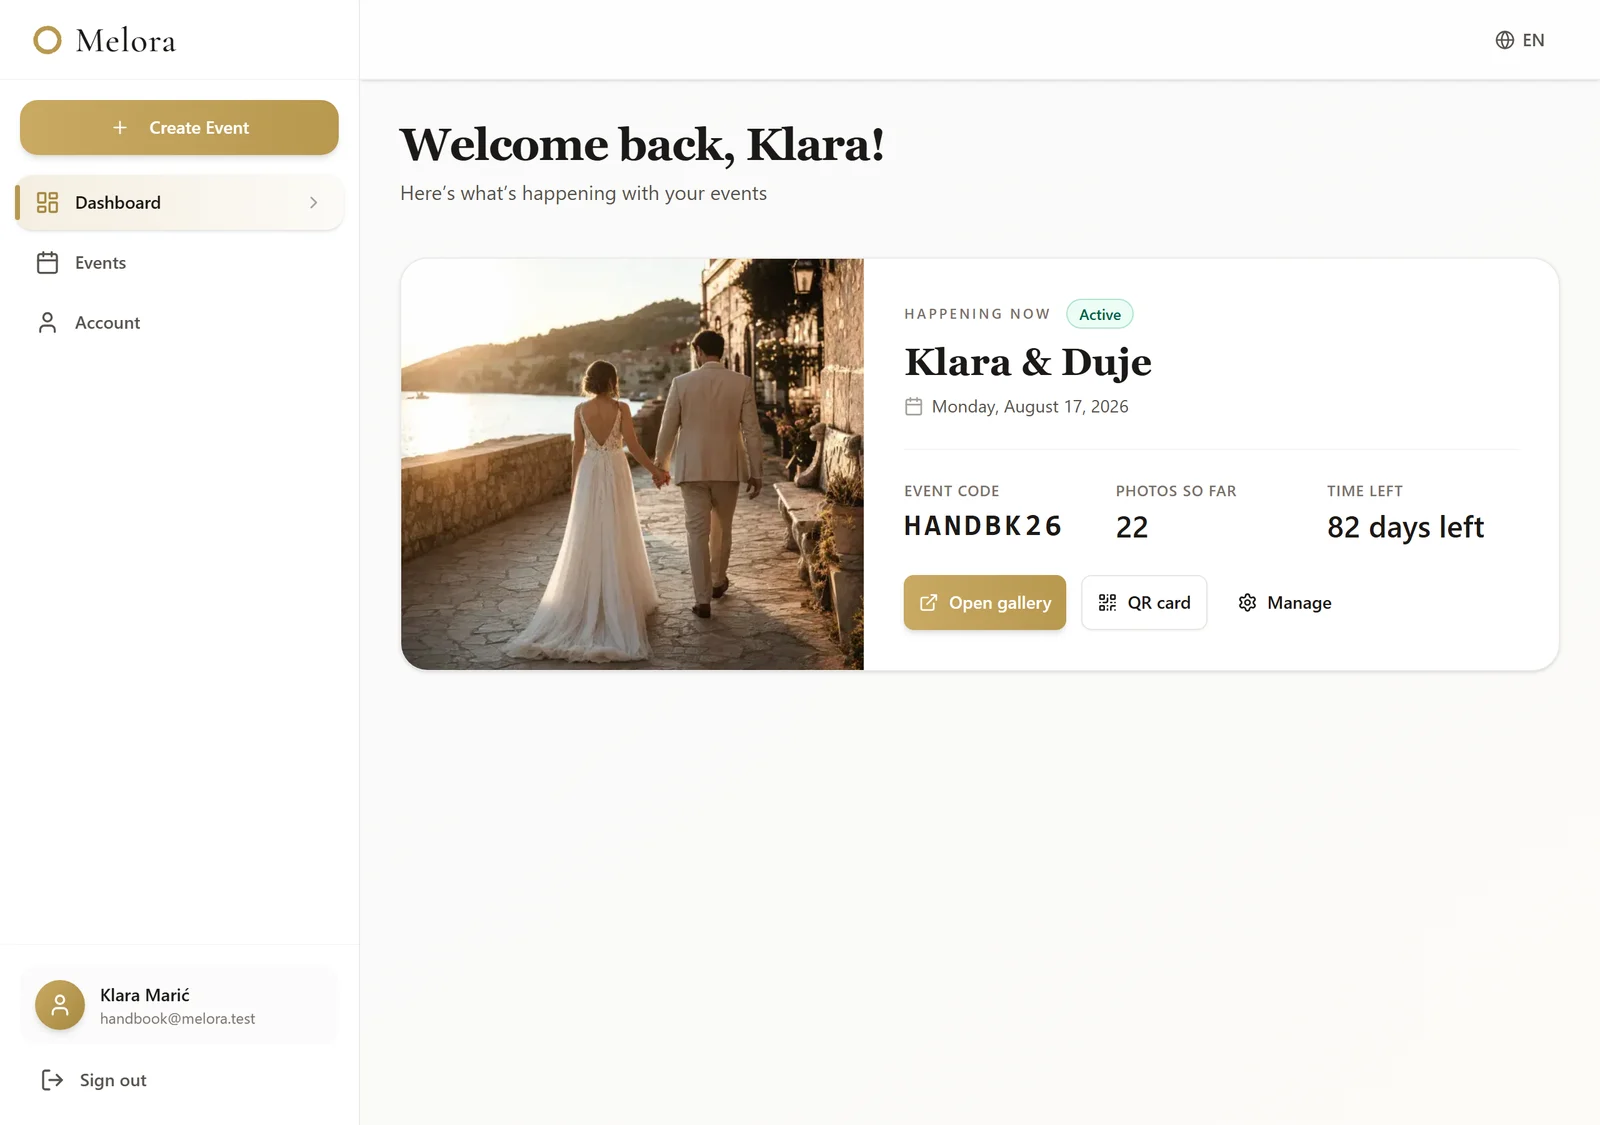
Opening an event gives you the detail: the count, the views, how much of your storage is gone, and every photograph that has arrived.
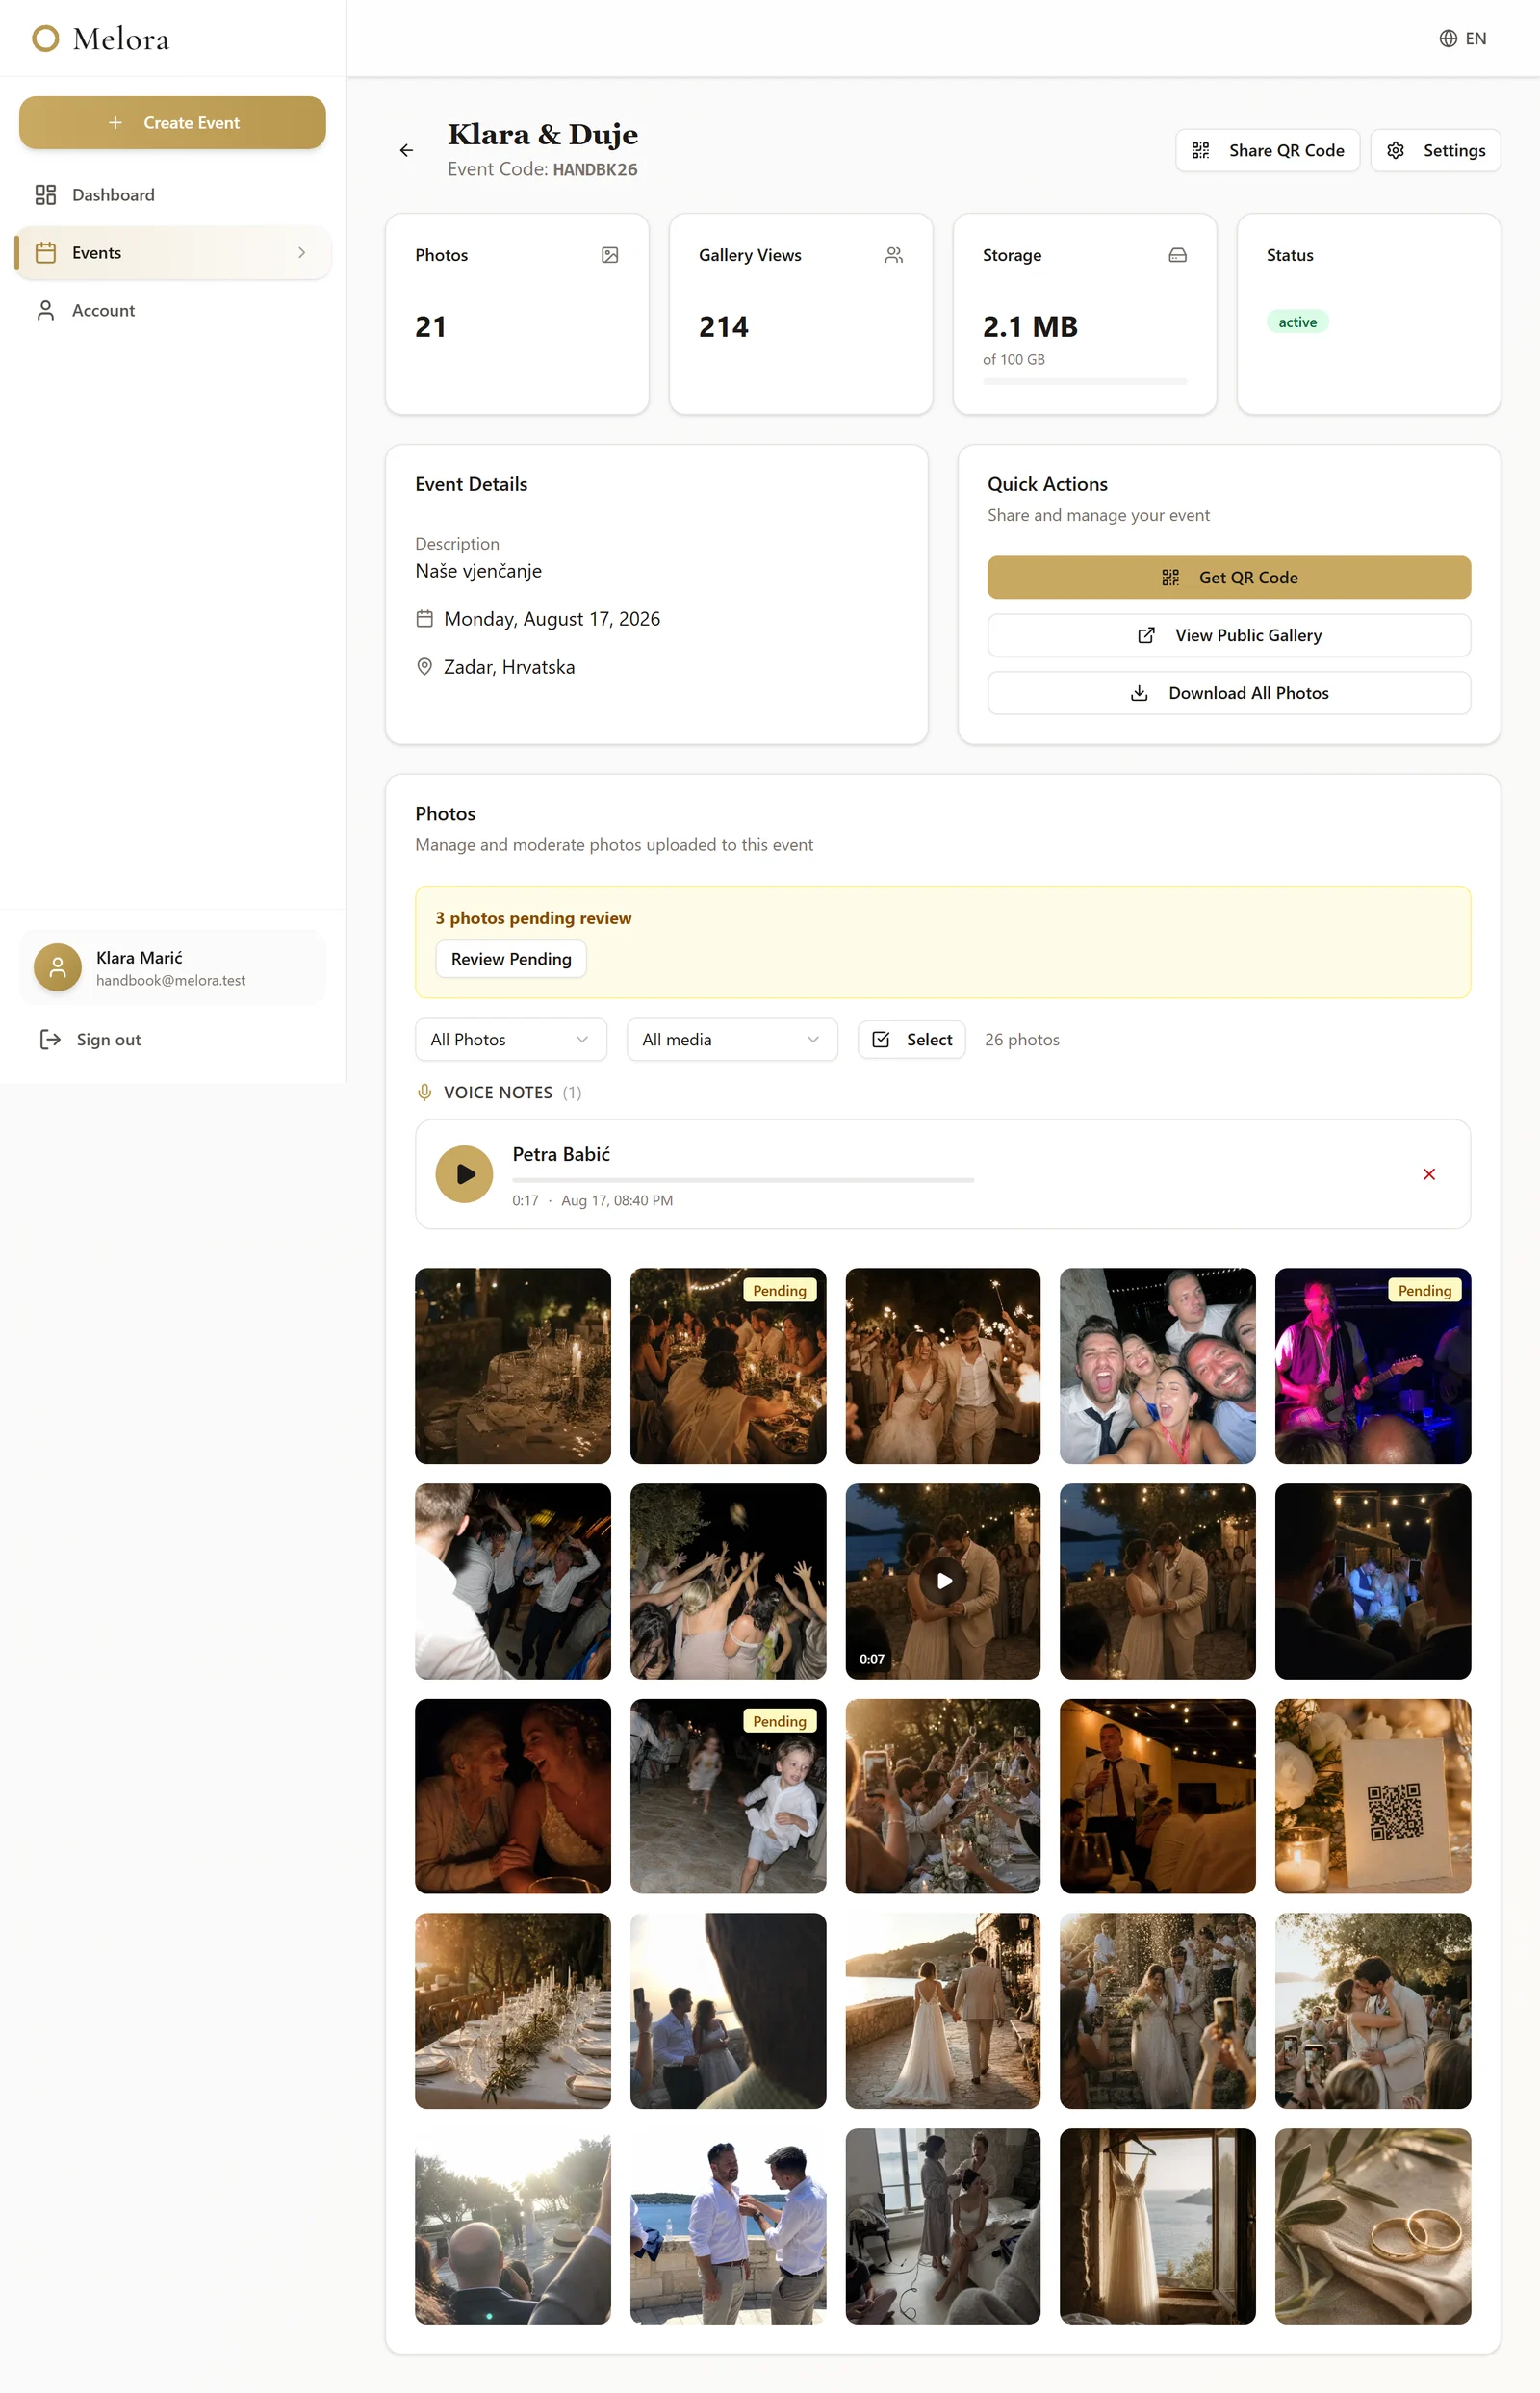
Approving what appears
If you switched Require approval on, every upload waits for you. Nothing a guest sends is visible to anyone else until you have looked at it.
With approval switched off — the default — photographs skip the middle box entirely and appear the moment they finish uploading. You can still remove anything at any time.
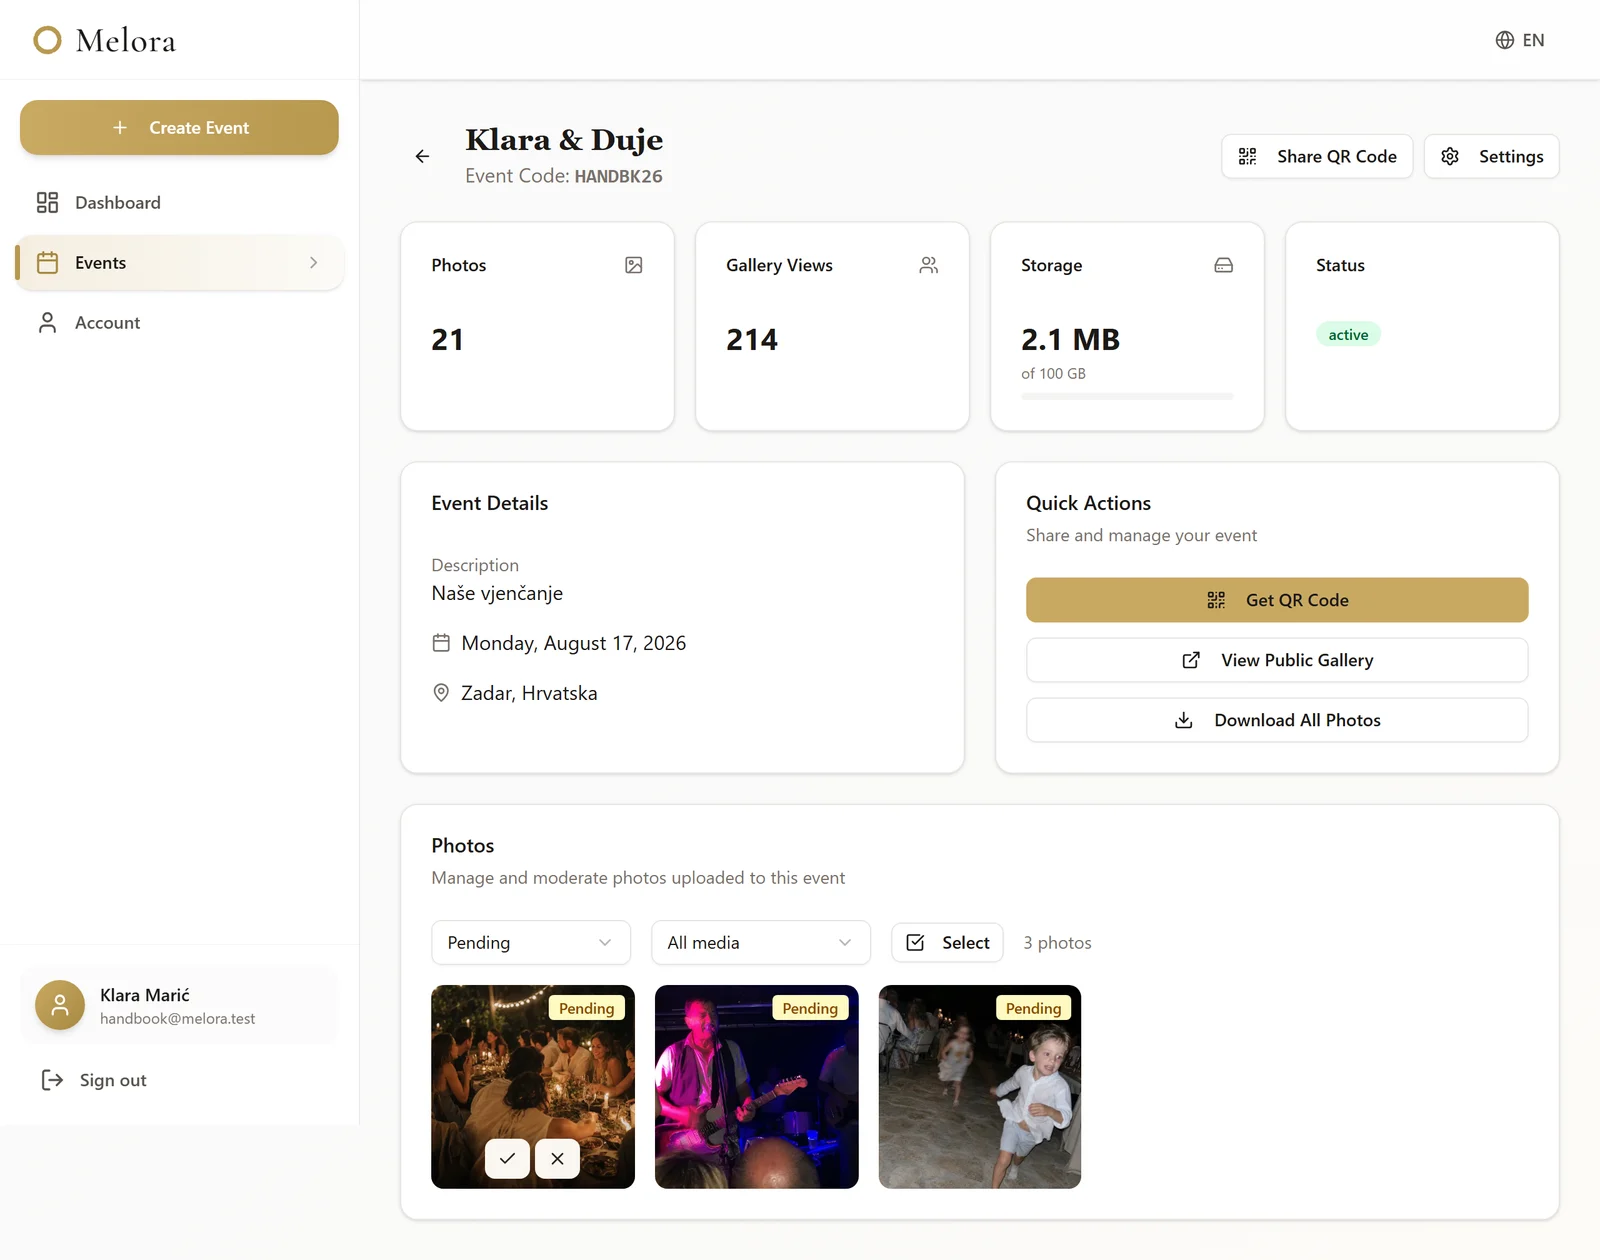
Approval is worth thinking about before the day rather than during it. It is the right call for a corporate event and usually the wrong one for a wedding, where the point is that photographs appear while everybody is still in the room.
Changing things during the event
Settings is reachable from the event page and everything in it takes effect immediately — no re-printing, no new code. The event code never changes.
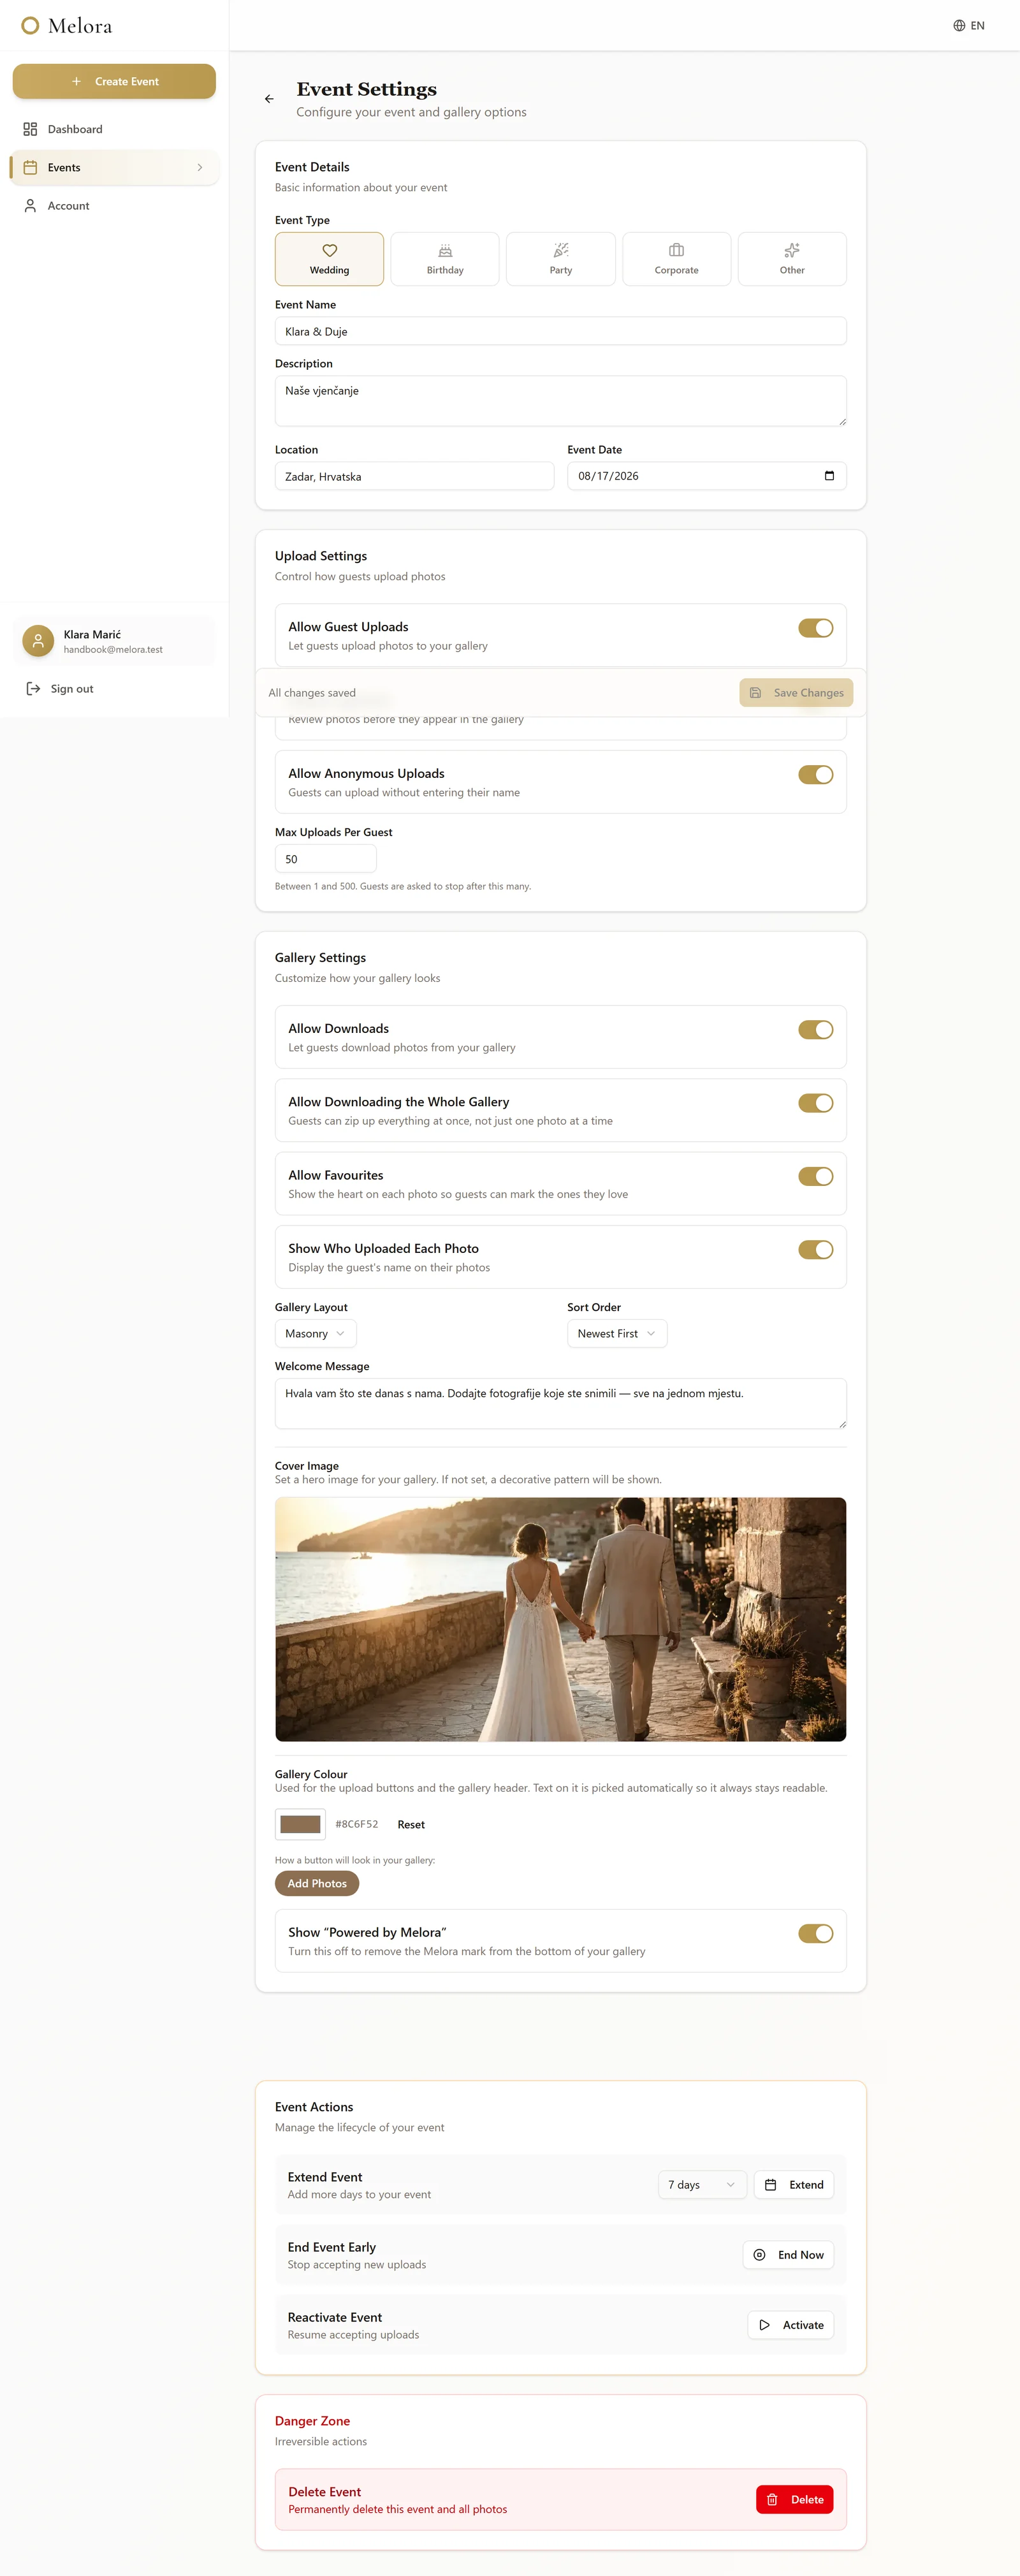
- A welcome message, shown across your cover photograph.
- A cover photograph, chosen from what has already been uploaded.
- Whether guests may download, and whether they may take the whole gallery at once.
- Whether names appear under photographs.
- Newest or oldest first.
- On every paid package, your own gallery colours and no Melora logo.
If you pick a cover photograph while approval is on, approve that photograph too. An unapproved cover is not shown to guests, and the gallery falls back to its plain backdrop.
For hosts
Afterwards
Getting everything off Melora and onto something of your own.
Downloading everything
Download All Photos on the event page builds a single archive of the gallery at full quality and sends it to you as one file. On a large gallery it takes a little while to assemble — that is the archive being built, not a stall.
Individual photographs can be saved one at a time from the gallery too. Either way you get the photograph in full quality, not the smaller copy used for display.
Do this once while the gallery is still open, even though nothing is deleted when the window closes. A copy you actually hold is worth more than one you can still reach.
Who can see what
Three kinds of thing end up in a Melora gallery and they are not treated alike. This is the whole rule:
| Uploaded | Other guests | You | In “Download all” |
|---|---|---|---|
| Photos | Yes | Yes | Yes |
| Videos | Yes | Yes | Yes |
| Voice notes | No — never shown | Yes | Yours only |
Reference
If something is not working
The handful of things that actually come up.
Common questions
A guest says the code will not scan
Check the card is standing up and not in shadow, and that it was printed at full size. Failing that, the link is written on the card underneath the code — they can type that instead.
A guest's video will not upload
Anything over 2 GB is refused, and even a long 4K clip rarely reaches that. Large videos upload in pieces and carry on from where they stopped if the connection drops — so a clip that fails outright is usually a format problem rather than a size one. Ask what kind of file it is.
Uploads stopped part way through
Venue wifi. The phone remembers what did not finish and offers those files again when the gallery is reopened — and it checks with us first, so a guest is never asked to re-send something that actually arrived.
A photograph is in the gallery that should not be
Open the event, find it in the photo list and delete it. It goes immediately, for everyone.
Nothing is appearing at all
Check that guest uploads are still switched on in Settings, and that the gallery window has not closed. Both are on the event page.
The gallery says the event has ended
The window has run out. Everything is still there to look at and download; get in touch and we can reopen it.
Anything else, write to us. A reply from a person is part of what you paid for.
That is the whole of it
If something here does not match what you are seeing, tell us — this page is meant to be the truth about the product, not a brochure.